
Patch
The patch says which fixtures the show contains: each one has a number, a name, a profile and a mode, and a DMX address. Fixtures are then selected by their number on the pad, in groups, cues and presets.
The Patch window ("Add a window" → Setup): the sections on the left, the fixtures of the section shown on the right. The section shown and the column widths are remembered with the window. Thousands of fixtures stay smooth: only the cards on screen exist.
Addresses and universes
An address is written universe.address: 1.1, 2.17, 12.301.
- A number alone is read as absolute:
513is address2.1(universe 2, address 1). - A universe has 512 channels; you can go up to 63,999 universes, as in sACN. The software limits nothing: it only says when the computer cannot keep up (see DMX Output).
- A fixture never spans two universes: one that no longer fits in a universe moves to the start of the next one.
- An empty address: the fixture has no address (unpatched). It stays in the show, can be programmed and is shown in Layouts, but outputs nothing.
Only universes where a fixture is patched are sent.
Adding fixtures
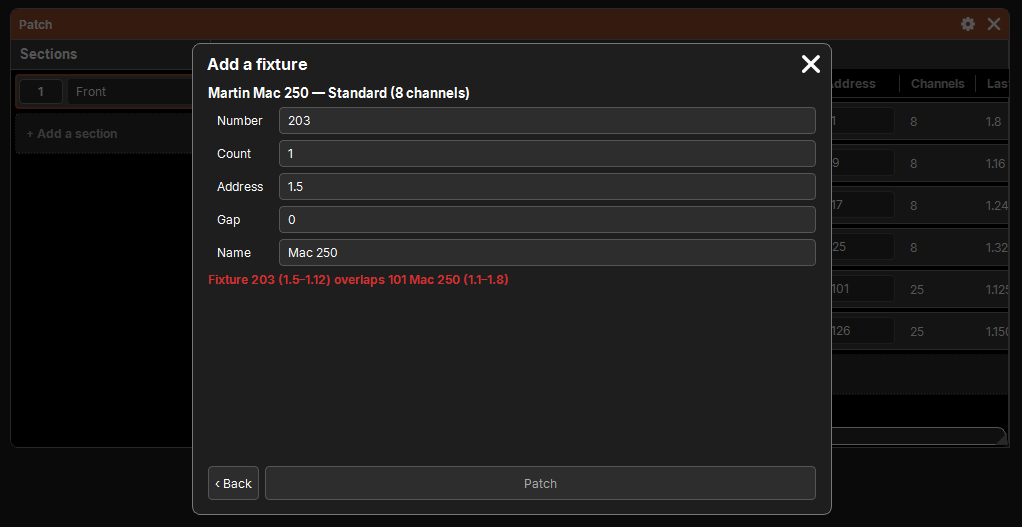
+ Add a fixture, at the bottom of the table, opens a two-step popup.
- Profile and mode: the Profiles and Modes columns of the Profiles window (search, collapsible brands). Choose a mode, then Next.
- Where to put them: the chosen profile and mode (with their channel count), then:
| Field | Purpose |
|---|---|
| Number | the number of the first fixture; suggested: the first free one after the section's fixtures |
| Count | how many fixtures (1 to 1000), numbered in sequence |
| Address | universe.address of the first one; empty: no address; suggested: the first place where they all fit without overlapping anything |
| Gap | free channels left between two fixtures |
| Name | the fixtures' name; suggested: the profile's name |
Everything is checked as you type: what is wrong is written in red (number taken, address overlapping a fixture, outside the universe…) and Patch stays grayed out. ‹ Back returns to step 1.
Patch creates the fixtures in the section shown, as a single history entry. The profile enters the show (the show keeps its own copy of its fixtures' profiles: it stays portable).
The fixture table
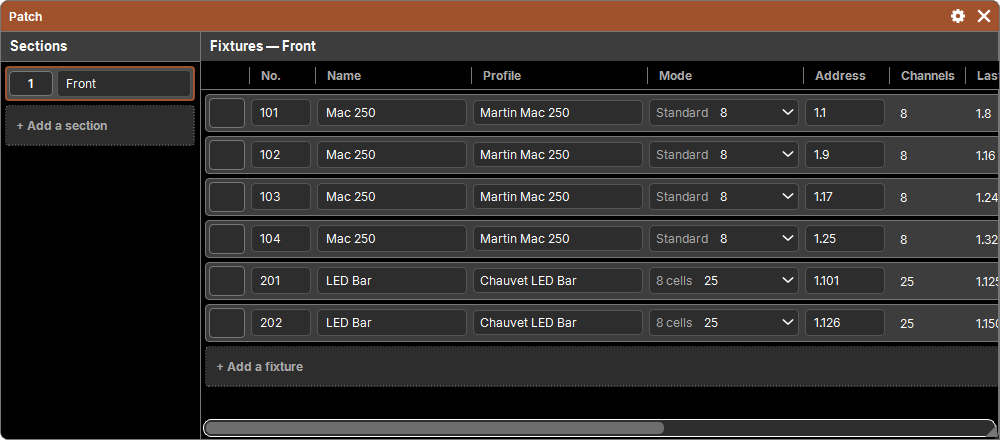
| Column | Purpose |
|---|---|
| (button) | the pad object: Delete, Copy, Move |
| No. | the number; can be changed if it is free |
| Name | typed directly |
| Profile | a tap chooses another profile |
| Mode | the list of the profile's modes |
| Address | universe.address |
| Channels | the channels occupied ("1.1–1.16") |
| Last channel | the end of the fixture |
| Sub-fixtures | the instances of a repeated module (see below) |
| Offset Pan, Offset Tilt | an offset in degrees |
| Invert Pan, Invert Tilt | Yes / No: the DMX output inverted |
A refused change (number taken, overlapping address, mode too large) goes back to the previous value, and the reason is written in the command line.
Changing profile or mode
- Mode: the list of the profile's modes. For a selection of fixtures of other profiles, each one takes the mode with the same name (with no mode of that name, it does not change).
- Profile: a tap opens the choice of profiles and modes, then Replace. The fixtures keep their number and address; a name still equal to the old profile's takes the new one's.
- In both cases, it is refused if the new size overlaps another fixture or exceeds the universe.
Sub-fixtures
A fixture whose profile places a module several times (an 8-cell LED bar, a multi-head fixture) has sub-fixtures: fixture 101 has sub-fixtures 101.1 to 101.8.
- 101 means the whole fixture (its head and all its cells);
- 101.3 means the third cell alone, wherever fixtures are designated: selection, groups, cues, presets;
- 101.0 means the head alone, without its cells (its square in a Layout).
Selection and sequential entry
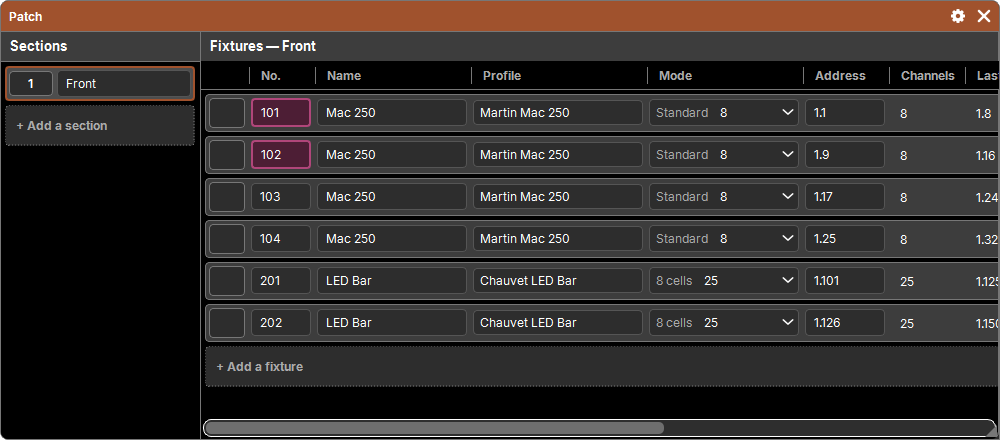
Table cells can be selected: a rectangle with a finger or the mouse, or a whole column by tapping its title (see selection). Then:
- No. selected: type a number in the command line, then Enter: the fixtures are renumbered in sequence, in the order you selected them. A number already taken by another fixture refuses everything.
- Address selected: type an address, then Enter: they are patched in sequence from that address. Type . alone to unpatch them all.
- Profile or Mode selected: the choice made in one applies to all.
- Offset selected: the typed value sets them all; Invert selected: a tap on one toggles them all.
This is the fast way to repatch a whole lighting plot: select the addresses in the desired order, type the first one, Enter.
Rigging: Offset and Invert
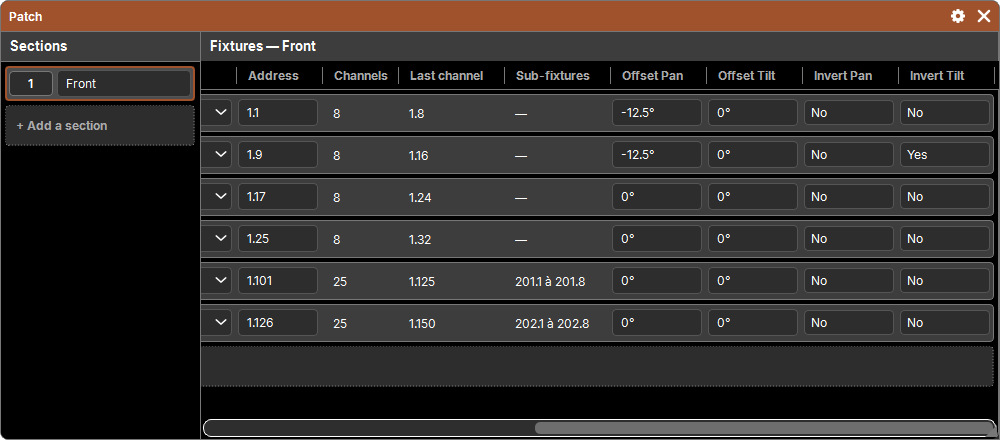
As in grandMA's patch, each fixture has its rigging:
- Offset Pan and Offset Tilt: an offset from −360 to 360° ("-12.5", "10°"), so that the same position aims at the same point whichever way the fixture is hung;
- Invert Pan and Invert Tilt: the DMX output inverted (a fixture hung upside down, or the other way round).
Rigging is applied just before the output: the Programmer, cues and presets do not see it. A position preset therefore stays valid for all fixtures, whichever way they face.
Delete, Copy, Move
The procedure is the same as everywhere (see lists):
- Delete then a tap on a fixture's button deletes it (with the selection if it is part of it).
- Copy then the fixture, then another fixture (or Enter: after the last one): copies arrive with no address, to be repatched, so as not to overlap anything by surprise.
- Move renumbers: the source takes the target's numbers (Replace, Append). Numbers are those of the whole patch, not of a section.
Sections
Sections organize the patch (by truss, by type, by area…); they change nothing at the output.
- + Add a section creates one, which is shown; rename it in its field.
- A tap on a section shows it; added fixtures go into the section shown.
- Delete then a tap on a section deletes it with its fixtures (Undo brings everything back).